Lab 9: Let's Have a Little Chat
Due by midnight tonight
Typing messages into instant messenger programs was once how everyone filled their time before the advent of smartphones. This lab implements a simple instant messenger program reminiscent of the now-defunct AIM.
Unlike AIM and its ilk, this program does not support a contact list or conversations with more than one other user. Instead, it uses a client-server model, where a server program listens for connections from a client program. Once the client connects, both parties are able to chat back and forth.
Specification
Create a project called Lab9 and create a package in your project called chat. Download the following four files and add them to the chat package.
Running the Client class creates a client. Running the Server class creates a server. The GUI class defines the GUI that both client and server use. All of the important socket communication happens within the Communicator class which both the Client and Server use for communication.
The Client, Server, and GUI classes have all been written for you, but you must complete four methods in the Communicator class.
Constructor
The majority of the work done by the Communicator is done in the constructor. It sets up a few variables and then repeatedly reads incoming data from the socket connection as follows.
- Store the argument
socketinto the member variablesocketso that it can be used by other methods - Use a
JOptionPanemethod to prompt the user (e.g.Enter your name:) and store the result intoname - Make a
tryblock and put the following inside: - Create a new
GUIobject and store it into the appropriate member variable - Create a new
PrintWriterobject based on the output stream ofsocketand store it into the appropriate member variable - Create a new
Scannerobject based on the input stream ofsocket - As long as
socketisn't closed: - If the
Scannerhas a line of input: - Read the line into a
Stringusing thenextLine()method - If the line is
"quit": - Call
dispose()onguito close it - Close the
Scannerobject - Close
socket - Otherwise:
- Call the
log()method ongui, passing in the line read so that the GUI logs what was received and displays it on its text area - Make a
catchclause that catchesIOExceptionbut don't worry about putting any error-handling code inside
send() method
The text that will be sent must always have name and a colon prepended to it so that the name of the sender is known.
Once you have formatted the input String to include the name, pass it as an argument to the log() method on gui to log the outgoing message.
Then, call println() on out with the same formatted String to send the message over the socket. Finally, call flush() on out so that the message is sent.
quit() method
Inside of a try block, use the println() method on out to send the String "quit". As before, call flush() so that the message is sent.
Close out. Close socket.
As you did in the constructor, make a catch clause after the try block that catches IOException but don't worry about putting any error-handling code inside.
getName()
Last (and least), getName() is merely an accessor that returns name.
Example
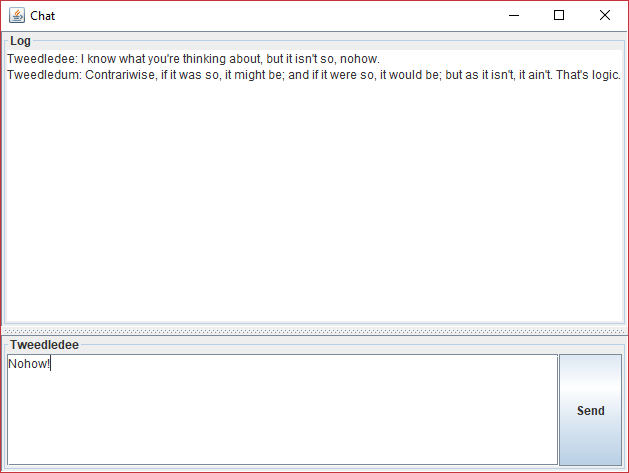
The running client or server should look much like the following. In this case, the two users are named Tweedledee and Tweedledum. Note that their names are prepended to any messages they send.
Testing
In order to test the program, you will need to first run Server. Do so by right-clicking on Server.java and selecting Run As -> Java Application. Select a reasonable port, anything between 1024 to 49151. I commonly use 4444.
Then, while Server is running, run Client by right-clicking on it and selecting the same option. You will need to use the same port, but you will also need to choose an IP address. The address 127.0.0.1 is what's called a loopback address and refers to your own computer. Thus, you can have two windows open and chat with yourself.
If you and another student both believe that your code works correctly, you can test your implementation by chatting with each other. To do so, one of you needs to run Server first, selecting an appropriate port number. The second person must run Client and enter the same port number and then the IP address of the first person's computer. To discover your computer's IP address on a Windows machine, you can hit the Windows button to open the Start menu. With the menu open, type cmd. The top choice should be the Command Prompt app. Click on this choice. Once the black terminal opens, type ipconfig. There are probably many options in this list. You want an IPv4 address, and you probably want one that lists otterbein.edu as its connection-specific DNS suffix. A usable IP address will not start with 127, 169, 196, or 255. Below is an example of a useful entry, listing the address 10.60.8.140.
Ethernet adapter Ethernet 2:

   Connection-specific DNS Suffix  . : otterbein.edu
   Link-local IPv6 Address . . . . . : fe80::f9de:35aa:edd9:f161%4
   IPv4 Address. . . . . . . . . . . : 10.60.8.140
   Subnet Mask . . . . . . . . . . . : 255.255.0.0
   Default Gateway . . . . . . . . . : 10.60.0.3
Turn In
Turn in your code by uploading Communicator.java from the Lab9\src\chat folder inside your workspace folder to Blackboard. Do not upload the entire project. I only want the Communicator.java file.
All work must be done individually. Never look at someone else's code. Please refer to the course policies if you have any questions about academic integrity. If you have trouble with the assignment, I am always available for assistance.